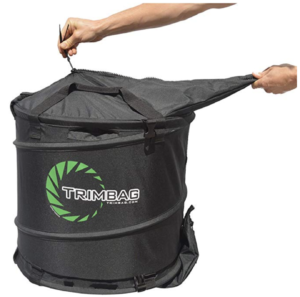
Here at ProCannaGro, we take pride in keeping our clients informed about the latest in time-saving cultivation technology. From the vegetative cycle to the flowering cycle, to harvesting and beyond, we’ve got the right tools to help you. In our previous blog, we reviewed the stellar DeBudder Edge as it compares to the DeBudder Bucket Lid. If you’re looking for more harvesting tools to help with optimizing your efforts, look no further than the Trimbag.
Quite often, you simply do not have the time for all of the delicate nuances needed to trim beautiful buds over and over again. Thankfully, with products such as the newly-released Trimbag you can count on maximum efficiency without breaking the bank. Keep reading as we discuss the proper techniques, rate of success, and this product’s usefulness in general.
Using the Trimbag
Before beginning to use the Trimbag, there are a few things you should consider. First, be sure that your cannabis product is dry enough to be used. A good test for this is by taking your buds and running your fingers along the outside. If the leaves and small branches break easily then you know you’re set. If they are still bendable, however, be sure to give your harvest a bit more time to dry (ideally there should only be about 6 – 12% humidity).
Next, we bucked the individual buds from the main branches, carefully placing them back into our bucket. We were now ready to give it a try! After loading the Trimbag to the recommended ⅓ of its capacity, we then put our muscles (don’t worry, the bag isn’t heavy) to use by performing an up-and-down lifting motion for approximately 20 repetitions on the first cycle. Pay attention to the “swish” that happens as your harvested product is percolated through the folds of the bag. An alternate method is to hold the Trimbag away from your body while twisting your wrists.
The next step is to turn the bag right side up and shake it from side to side. Put your hands in the sifting pockets and give it a good up-and-down motion here as well. In total, there should be about 30 repetitions for every batch.
An Excellent Trim Solution
After trying the Trimbag over several cycles and various different types of cannabis & hemp, we can safely say that this product is one that is a vital addition to any cultivation setup. The final results that came out of the bag appear as perfectly trimmed individual nugs, with all the fan/water leaves taken off. The trichromes and terpene flavors are fully intact and we couldn’t be more impressed with the little amount of time it takes to get the job done.

Another great advantage of the Trimbag is that the process creates two different and wholly usable byproducts: one trim has more sugar leaf, and the other trim product has more fan/water leaf. One of the most amazing things about the cannabis plant is the many uses of its various parts. The Trimbag maximizes your harvest by ensuring the salvage of the whole plant.
DeBudder & Trimbag Combo
Our previous blogs talked about the amazing DeBudder Edge/Lid as they figure into harvests of all shapes and sizes. These products are there to help you get your cannabis to the next step of the cultivation cycle: trimming. Using the DeBudder Edge/Lid before running your harvest through the Trimbag is the ideal situation for any beginner or expert grower. The perfectly shucked/bucked nugs that come from using DeBudder products are tailor-made to go straight into the Trimbag for optimal trimming and byproduct salvage. Try it, you won’t be disappointed!
Stay tuned to the PCG blog for further information on vital products and knowledge to make your cultivation efforts soar!

